
STRUCTURED TRADING COACHING
The Traders Mastermind Inner Circle
Your Roadmap to Building a Structured Trading Process
Execution
Review
Replays
Downloadable Templates
Why the Inner Circle Exists
Many traders struggle because their education is fragmented.
They may learn a pattern from one place, a setup from another, a risk rule from somewhere else, and then try to combine everything without a proper structure.
This usually leads to confusion, inconsistency, and emotional decision-making.
The Inner Circle solves this by bringing the key parts of trader development into one structured environment:
It is not built around hype, signals, or promises of quick profits.
It is built around education, process, and trader development.
Who the Inner Circle is for?
What Members Get Each Month
This gives members a more complete development path compared to joining only one individual pathway.
Two Strategist sessions
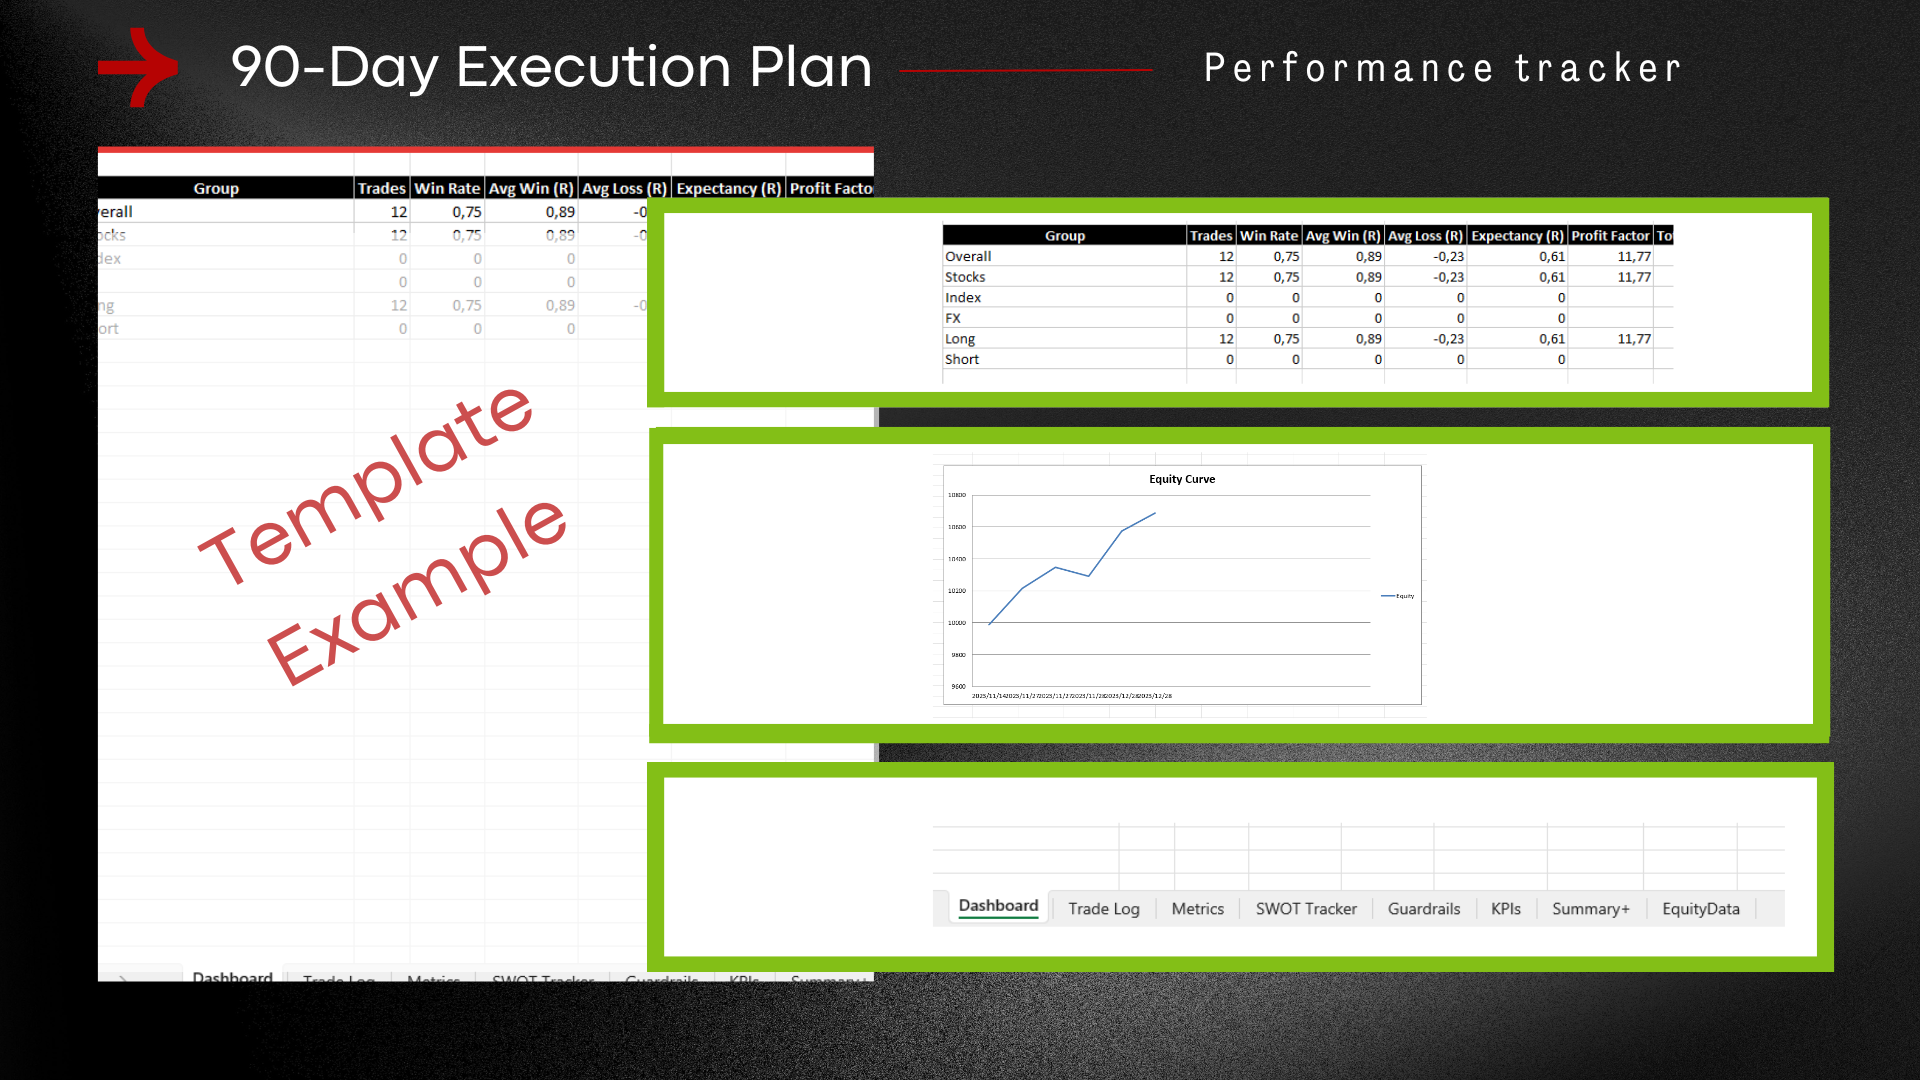
Templates and worksheets
Historical sessions
Why should I choose Inner Circle?
You get access to Technical Blueprint + Strategist
and direct contact with the coaches
Our comprehensive framework is designed to empower you with a structured approach that simplifies complex choices, ensuring you make informed decisions with confidence.
With expert guidance and a supportive community, you’ll navigate challenges more effectively and achieve your goals faster.
Our unique, structured approach combines practical tools with personalized guidance, ensuring you not only learn but also apply your knowledge effectively in real-time trading scenarios.
The Inner Circle includes full access to both pathways compared to joining separately.
Program Overview
The Technical Blueprint is the chart-reading and technical analysis pathway inside The Traders Mastermind.
It is designed to help traders build a clearer process for reading markets, identifying structure, understanding price behaviour, and improving trade selection.
The Technical Blueprint guides you step-by-step through chart analysis, ensuring you grasp the essential concepts and strategies.
No more guesswork—just a clear roadmap to trading success.
Each month includes two Technical Blueprint sessions.
This session focuses on building the foundation.
Members are guided through the core technical analysis concepts that every trader needs to understand, including market structure, trend behaviour, support and resistance, moving averages, candlestick behaviour, pullbacks, breakouts, reversals, and basic chart interpretation.
The goal is to help newer or less confident traders understand what they are looking at on a chart before trying to make trading decisions.
This session builds on the beginner topic and applies it to more practical market examples.
Members learn how the same technical concepts can be applied to real market charts, using prepared examples and historical chart behaviour to show how price action develops in different conditions.
The focus is on practical chart reading, confluence, decision-making, and avoiding random or emotional trade selection.
Technical Blueprint
This pathway is designed for traders who want to improve their technical analysis without becoming overwhelmed by complicated terminology or conflicting methods.
It is suitable for newer traders who need a proper foundation, as well as developing traders who already understand basic charting but want a clearer process for reading price action and improving trade selection.
What you get:
- One beginner-focused technical analysis session.
- One intermediate technical analysis session.
- A structured monthly topic that builds on the previous month.
- Practical chart examples showing clean versus poor-quality setups.
- A clear progression from basic chart reading to more advanced decision-making.
- Access to the relevant recordings and resources included in the Technical Blueprint membership level.
Learn how to identify higher highs, higher lows, lower highs, and lower lows so trend direction becomes clearer and more consistent across different charts and markets.
Objectives
- Identify higher highs, higher lows, lower highs, and lower lows
- Read trend direction through structure rather than guesswork
- Separate cleaner structure from noisy price movement
- Understand how pullbacks fit inside trend development
- Build a stronger foundation for reading market structure
Learn how to identify meaningful support and resistance zones using swing points, reaction areas, and price structure.
Objectives
- Understand the purpose of support and resistance in chart reading
- Use swing points and reaction areas to mark levels
- Create practical zones instead of cluttering charts with lines
- Recognise major turning points versus minor reactions
- Improve chart clarity through cleaner level selection
Build on session 1 by learning when to use candle wicks, when to use bodies, and how to judge whether price is reacting cleanly at an important level.
Objectives
- Know when candle wicks matter more than bodies
- Judge whether price is respecting a level cleanly
- Separate cleaner zones from messy or weak zones
- Recognise when a level has lost relevance
- Use level quality as part of a broader technical view
Learn how moving averages can be used to read trend condition, pullback quality, and chart structure more effectively.
Objectives
- Understand what the 8, 21, and 89 EMA can show on a chart
- Use EMAs to judge basic trend condition
- Recognise pullbacks into dynamic support or resistance areas
- Improve chart reading by combining EMAs with price structure
- Avoid relying on moving averages in isolation
Take the next step by looking at how EMA behaviour changes during pullbacks, transitions, and possible trend reversals.
Objectives
- Read price position relative to the 8 and 21 EMAs
- Understand how EMA crosses fit into trend context
- Recognise when EMA behaviour suggests weakening momentum
- Use the 21 and 89 EMA relationship in a broader trend view
- Avoid taking EMA crosses without structure confirmation
Learn how candles can reveal momentum, hesitation, compression, and possible breakout or reversal conditions.
Objectives
- Understand the practical meaning of candle bodies and wicks
- Recognise rejection, expansion, and indecision behaviour
- Use candles to read buying and selling pressure
- Identify compression as a build-up condition
- Treat candles as context rather than isolated signals
Build on candle reading by showing why the same pattern can be strong in one location and weak in another.
Objectives
- Compare candle patterns at meaningful versus poor locations
- Combine candles with structure and support or resistance
- Recognise when a pattern is strong because context supports it
- Avoid trading candle patterns in the middle of noise
- Improve timing by using candle behaviour more selectively
Learn how Fibonacci retracement levels can help identify pullback zones within a broader technical analysis process.
Objectives
- Understand the purpose of Fibonacci retracement levels
- Apply Fibonacci to cleaner swings and structure
- Use retracement areas as zones of interest rather than guarantees
- Combine Fibonacci with support, resistance, and trend
- Avoid forcing Fibonacci onto poor chart swings
Expand on retracements by using extensions to judge overextended price, reaction zones, and possible continuation targets.
Objectives
- Use Fibonacci extensions to identify stretched price conditions
- Recognise possible reaction and exhaustion areas
- Use extensions alongside structure and momentum context
- Judge whether price still has room to continue
- Build a more practical Fibonacci workflow
Focus on patterns that still have practical value, such as flags, wedges, triangles, channels, and double tops or bottoms.
Objectives
- Recognise common chart patterns that still add value
- Understand the structure behind flags, wedges, and triangles
- Read patterns as behaviour rather than textbook shapes
- Compare cleaner patterns with weaker or distorted ones
- Use patterns to support chart reading without forcing them
Take setup quality further by learning how to filter out poor chart conditions and improve technical selectivity.
Objectives
- Understand what confirmation and confluence actually add
- Combine structure, trend, candles, and context more effectively
- Filter out weak signals and low-quality chart conditions
- Avoid overcomplicating analysis with unnecessary factors
- Build a cleaner process for identifying stronger setups
Learn how to judge whether a pattern is technically strong by looking at location, structure, timing, and room to move.
Objectives
- Separate a chart pattern from a technically valid setup
- Judge setup location in relation to structure and levels
- Assess whether timing is early, mature, or already late
- Recognise when a setup has enough room to work
- Improve technical selectivity by focusing on setup quality
Build on pattern recognition by learning how context, maturity, and location affect pattern quality.
Objectives
- Judge whether a pattern is early, mature, or already late
- Use context and location to assess pattern quality
- Recognise when a pattern is weak despite looking neat
- Avoid textbook pattern trading without market context
- Improve trade selection by grading pattern quality
Learn how to judge breakout quality using compression, location, momentum, and available room.
Objectives
- Understand what a breakout is actually showing on a chart
- Recognise cleaner breakout structures and build-up conditions
- Judge whether a breakout has enough room to develop
- Use momentum and location to improve breakout assessment
- Avoid reacting to every move through a level
Study how weak breaks fail, how trap structures form, and why failed breakouts often create stronger technical opportunities.
Objectives
- Recognise failed breakouts and false continuation
- Understand how trap structures usually develop
- Use failed moves as information rather than frustration
- Separate cleaner reversal opportunity from random noise
- Improve decision-making around breakout failure
Learn when stretched markets are more likely to revert and when fading price is a low-quality idea.
Objectives
- Understand what mean reversion is in practical chart terms
- Recognise stretched price versus healthy trend movement
- Separate cleaner reversion conditions from dangerous fades
- Use location and context to improve reversion analysis
- Avoid treating every extended move as an automatic reversal
Apply oscillators properly by using them to read stretch, exhaustion, and market condition in context.
Objectives
- Understand what Stochastic, CCI, and Williams %R are measuring
- Use oscillators to support chart context rather than replace it
- Recognise stretch and exhaustion more effectively
- Separate trend continuation conditions from reversion conditions
- Avoid simplistic oscillator signals without technical context
Learn how RSI can be used to read momentum condition, shift, and possible weakness rather than as a simplistic signal tool.
Objectives
- Understand RSI beyond basic overbought and oversold ideas
- Use RSI to judge momentum condition and possible shift
- Recognise when RSI behaves differently in trends and ranges
- Combine RSI with price action and structure
- Avoid reducing RSI to one-click trading signals
Build on momentum analysis by using Bollinger Bands to identify stretch, squeezes, and volatility expansion conditions.
Objectives
- Use Bollinger Bands to recognise compression and expansion
- Identify stretch and squeeze conditions more clearly
- Understand how volatility affects setup quality
- Combine volatility clues with structure and momentum context
- Improve timing by reading volatility behaviour more practically
Learn how to compare markets, sectors, or shares to identify technical leadership and laggards.
Objectives
- Understand what relative strength and weakness mean on charts
- Compare markets, sectors, or shares more effectively
- Recognise leadership and laggards in a technical way
- Use comparison work to improve chart selection
- Add a market-selection layer to technical analysis
Turn relative strength work into a practical process for finding charts with stronger technical potential.
Objectives
- Build a cleaner technical watchlist process
- Use chart quality and leadership clues for selection
- Filter weaker opportunities out earlier
- Focus attention on charts with stronger technical potential
- Improve preparation by narrowing attention more effectively
Learn how the opening phase of a market session can shape chart quality, false starts, and early technical opportunity.
Objectives
- Understand why opening range behaviour matters
- Recognise early momentum versus false starts
- Use session structure to improve chart context
- Separate cleaner early opportunity from opening noise
- Add time-of-day awareness to technical analysis
Strategy and execution pathway
Building the Trader
The Strategist sessions are focused on the practical side of trading: systems, strategy design, risk management, trade planning, execution, review, and improvement.
It is designed to enhance your understanding, leading to improved trading choices, effective risk management, and disciplined review practices.
Where the Technical Blueprint focuses mainly on reading the chart, the Strategist sessions focus on what the trader does with that information.
Each month includes:
These sessions are designed to help members think more clearly about trading as a process, not just a collection of entries and exits.
The Strategist pathway is ideal for traders who already understand some basic charting but want a more organised way to turn analysis into a repeatable trading approach.
Building and testing trading rules
Trade management
Position sizing
Risk control
Stop placement
Profit-taking methods
Journaling and performance review
Strategy refinement
Mistake reduction
Process improvement
Market preparation
Trader behaviour and discipline
Before you can grow, you need to diagnose. In this kickoff session, we walk through a live trading audit designed to uncover what’s really holding you back from consistent performance. Using a structured 5-part framework, you’ll evaluate:
- Win rate & expectancy – Are your trades mathematically sound?
- Strategy types used – Are your methods aligned with your market?
- Execution consistency – Are you following your rules or freelancing?
- Capital deployment – Are you risking too much, or not enough?
- Time commitment vs returns – Is your effort aligned with your results?
You’ll receive a Trading Audit Template to complete privately after the session. This forms the foundation for your personalized growth path and feeds directly into the next session’s 90-day execution plan.
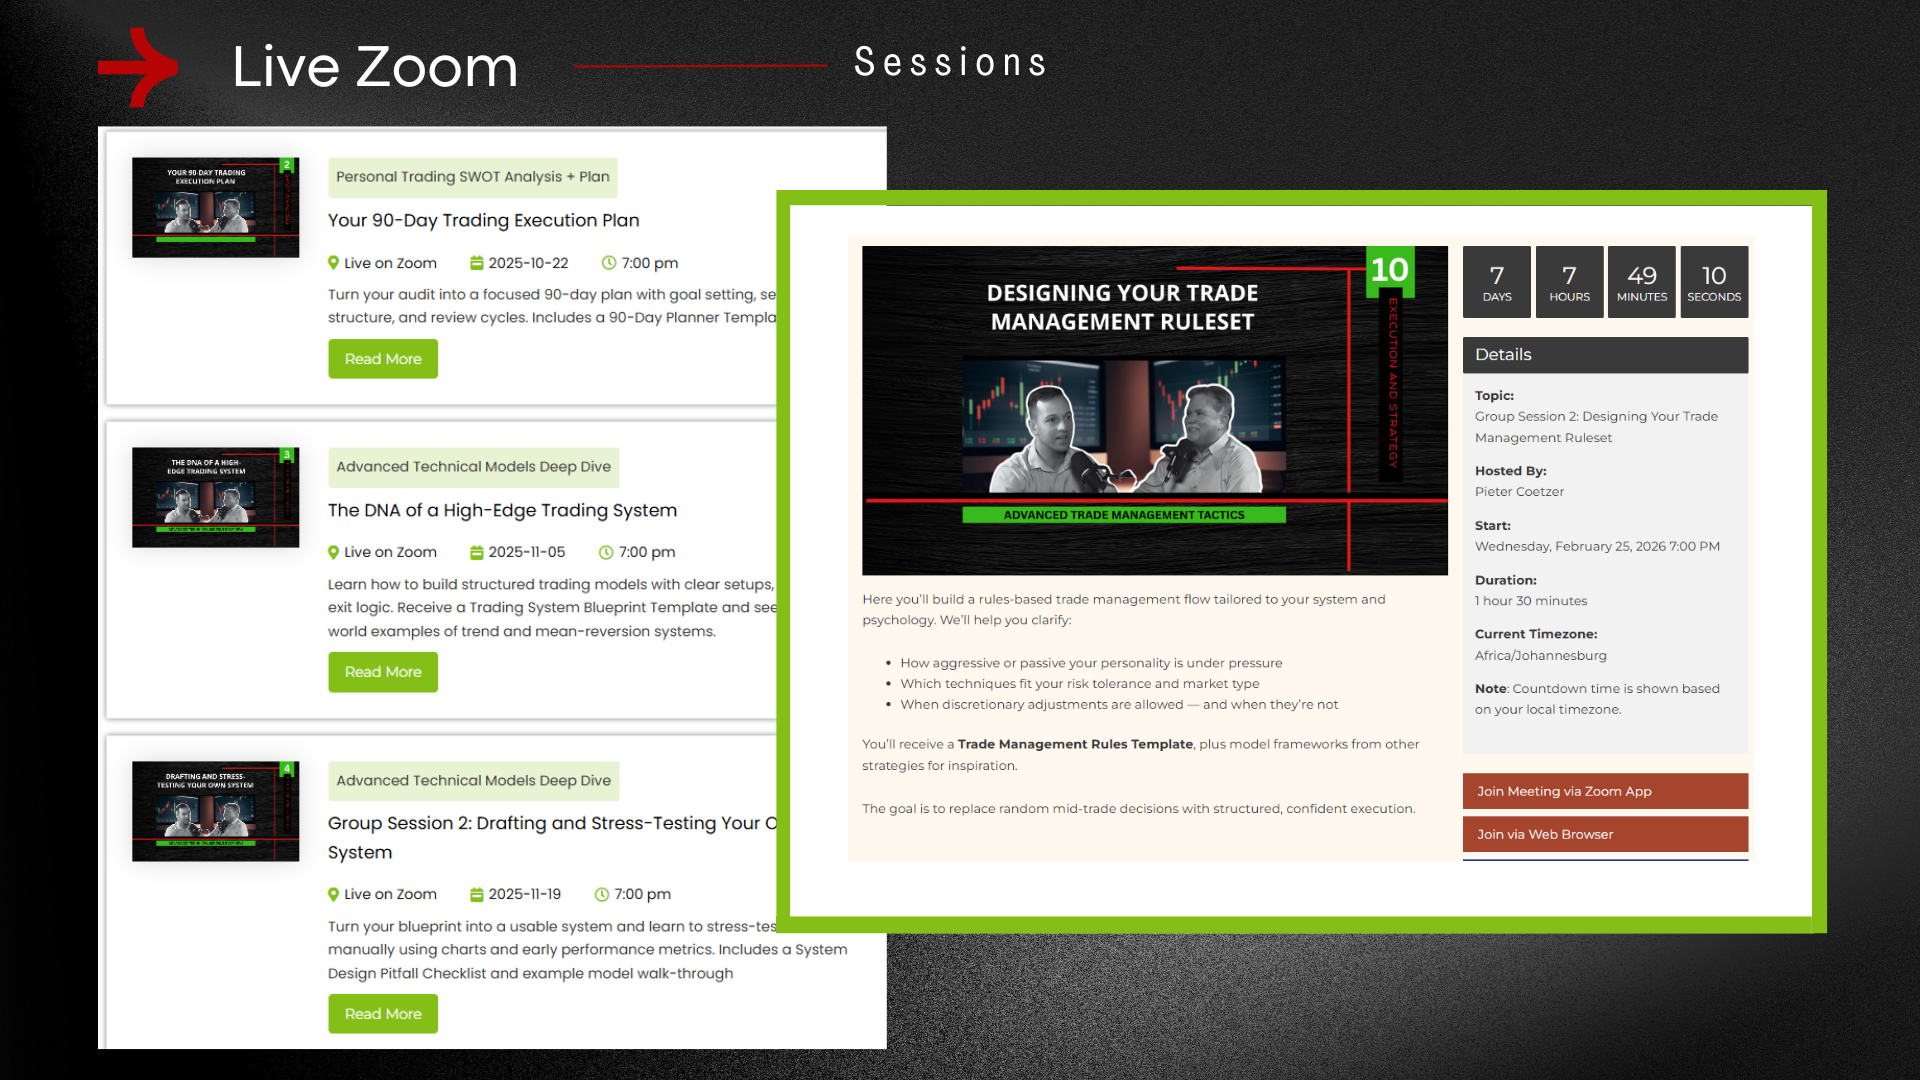
Now that you’ve identified your key trading bottlenecks, it’s time to build a focused and realistic action plan. In this session, you’ll learn how to design a 90-day trading execution plan that turns your audit results into measurable progress.
Turn your audit into a focused 90-day plan with goal setting, session structure, and review cycles. Includes a 90-Day Planner Template.
We’ll cover:
- Goal setting – Define what success looks like
- Session planning – Structure your daily and weekly trading time
- System review cycles – Set checkpoints for improvement and feedback
You’ll receive a 90-Day Planner Template, along with sample plans to help you get started. One or two volunteers may choose to share their plan for group feedback — completely optional.
In this session, we take a deep dive into how professional traders build advanced technical models that go beyond basic indicators. The goal is to understand what separates a generic setup from a structured, rules-based model with a real edge. Learn how to build structured trading models with clear setups, filters, and exit logic.
You’ll learn the 5 key components that form the backbone of any effective system:
- Market condition filter – Identify the environment your model works in
- Setup trigger – Define precise entry signals
- Confirmation logic – Add filters to reduce noise and false signals
- Entry method – Detail the exact conditions for pulling the trigger
- Exit rules – Create logical stop loss and take profit criteria
We’ll walk through examples of both trend-following and mean-reversion systems to show how these concepts apply in real markets.
You’ll also receive a Trading System Blueprint Template to start drafting your own model.
With your blueprint in hand, we now focus on transforming theory into practice. In this session, you’ll begin designing your own advanced model and stress-test it for logical consistency and clarity.
We’ll cover:
- Translating setups into rule-based logic.
- Manual chart testing to identify edge.
- Key metrics to evaluate system potential (e.g., win rate, reward-to-risk).
- Spotting design flaws before risking real money.
You’ll receive a System Design Pitfall Checklist and see a live example of a technical model being built and stress-tested from scratch.
Sharing your draft system for feedback is optional — the focus is on creating a structure that matches your style, market, and mindset. This is where trading becomes systematic, not just reactive.
Most traders blow up not from bad trades — but from bad risk math. In this session, we break down the concept of risk of ruin and why it’s the #1 silent killer of trading accounts.
You’ll learn:
- The formula for calculating your personal risk of ruin
- Why win rate and payoff ratio are not enough
- How drawdown, capital at risk, and system edge interact
- The truth about why under-capitalised accounts struggle the most
You’ll receive a Risk of Ruin Calculator (Google Sheets) to plug in your stats and see your personal probability of long-term survival or collapse.
Once you understand your risk tolerance and system volatility, it’s time to scale — safely. This session focuses on crafting a risk plan that protects your capital while giving you room to grow.
We’ll cover:
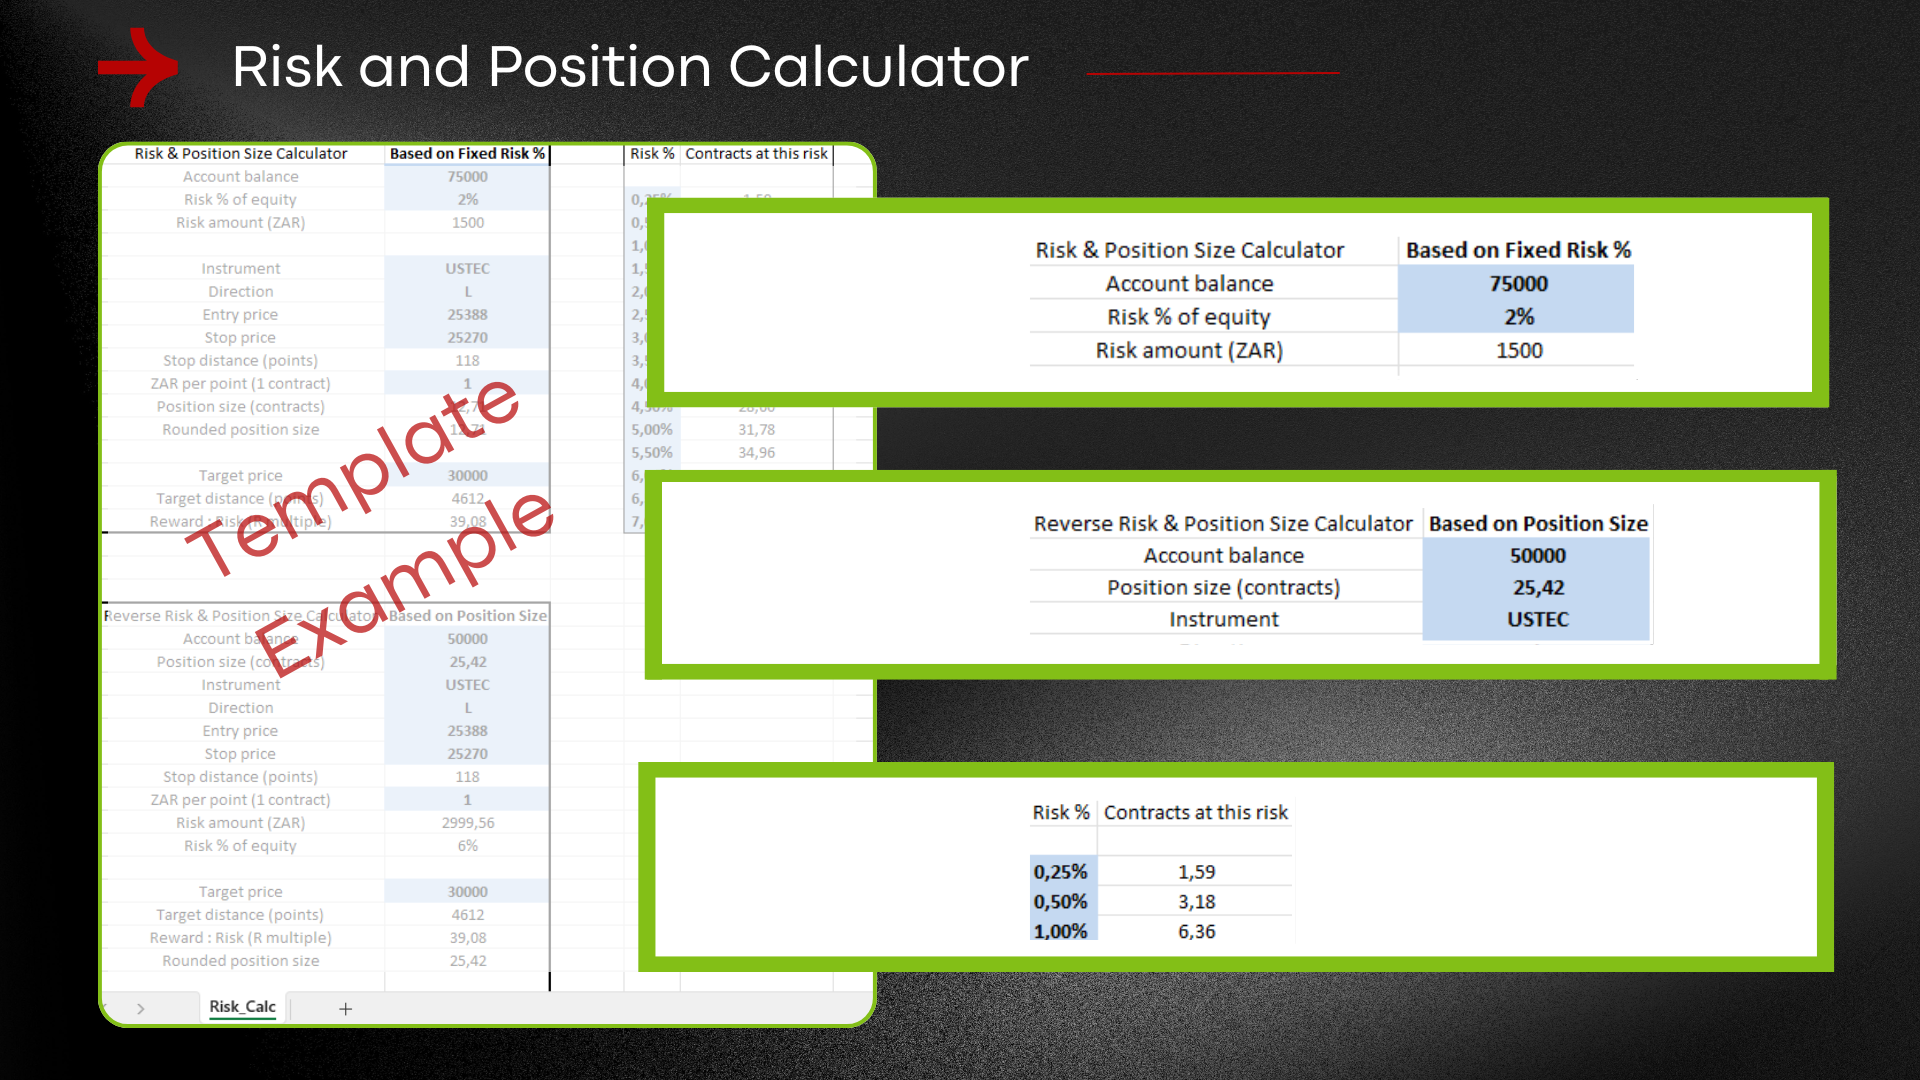
- Creating dynamic position sizing models
- Fixed fractional vs volatility-adjusted risk
- Scaling in/out of trades based on equity growth
- Risk limits: max daily, weekly, and monthly loss rules
You’ll receive a Risk Scaling Template to define your personal rules based on your current account size, strategy, and goals.
This is about becoming a risk manager first — so your trading account survives long enough to thrive.
Even with the best strategy, your mind can sabotage your execution. In this session, we unpack the core emotional and cognitive patterns that lead to inconsistency, hesitation, and tilt.
You’ll explore:
- Fear of loss and the over-avoidance loop
- Revenge trading and frustration cycles
- Overconfidence after wins
- Paralysis from perfectionism or past trauma
You’ll receive a Mental Game Self-Assessment to help identify your dominant pattern and where it most affects your trading behavior.
With awareness comes action. This session helps you build a repeatable psychological routine to stay grounded, focused, and emotionally resilient.
We’ll cover:
- Pre-market routines and mental reset triggers
- Tools like breathwork, affirmations, and journaling
- Post-trade recovery and emotional debrief techniques
- Customizing a “mental fitness checklist” for daily use
You’ll receive a Mental Edge Routine Template and examples of real trader mindset workflows used by top performers.
This is about managing the person behind the system — so your edge shows up when it matters.
Here you’ll build a rules-based trade management flow tailored to your system and psychology. We’ll help you clarify:
- How aggressive or passive your personality is under pressure
- Which techniques fit your risk tolerance and market type
- When discretionary adjustments are allowed — and when they’re not
You’ll receive a Trade Management Rules Template, plus model frameworks from other strategies for inspiration.
The goal is to replace random mid-trade decisions with structured, confident execution.
Different market conditions demand different responses. In this session, you’ll learn how to categorize markets (e.g., trend, range, chop, volatility spike) and map out your tactical responses to each.
We’ll cover:
- How to quickly identify the current environment
- What to do in each: entries, exits, risk
- Examples of playbooks for trend and range systems
- When to sit out vs when to double down
You’ll receive a Market Playbook Template to start capturing your best approaches per condition.
This hands-on session is about building evidence-based playbooks using your own trades and screenshots.
We’ll walk through:
- Collecting examples of successful setups by condition
- What to include: chart image, entry logic, management, outcome
- Creating a digital or printed binder of setups to reference before sessions
You’ll receive a Screenshot Cataloging Guide and an example of a complete mini playbook.
This builds confidence by replacing market guesswork with scenario-based readiness.
Most traders either don’t journal or do it wrong. In this session, we explore how to build a journaling system that’s fast, insightful, and actually improves performance.
We’ll cover:
- What to track (hint: it’s not just win/loss)
- The 3 layers of journaling: data, emotion, and reflection
- Examples of effective trade log formats (manual and digital)
- How to reduce journaling to under 5 minutes per day
You’ll receive a Journaling Template Pack — options for Google Sheets, Notion, and handwritten styles.
Journaling only works if you close the loop. This session focuses on how to extract insights from your log and turn them into weekly or monthly improvements.
You’ll learn:
- Reviewing for patterns in wins and losses
- Tracking strategy drift and rule-breaking
- Creating review rituals (Friday reviews, monthly feedback loops)
- Using tags and notes to filter by setup, time, or emotion
You’ll receive a Journaling Review Cheat Sheet and a Tracker Dashboard Template to monitor consistency over time.
This creates a feedback system that turns experience into actual growth.
No system works in all conditions. In this session, we break down how trend and range markets behave — and how to build strategies designed for each.
You’ll explore:
- How to detect market mode with EMAs, ATR, and price action
- Setup structures that work best in each condition
- Managing entries and exits based on volatility cycles
- When to switch modes — and when to stay out entirely
You’ll receive a Trend/Range Strategy Comparison Guide and a decision tree for identifying current conditions.
Now you’ll take what you’ve learned and refine your system(s) to work better within your preferred market mode.
We’ll cover:
- Adjusting entry filters and exit logic per condition
- Using optional overrides (e.g., range filters in trending systems)
- Creating mode-based trade plans to switch between systems
You’ll receive a Strategy Adjustment Template and access to two sample systems — one trend, one range — to compare and adapt.
This teaches versatility while maintaining structure — essential for long-term edge
Group Session 1: expanding your trading universe
Most traders over-concentrate — in strategy or market. In this session, we explore how to intelligently diversify across instruments without losing focus.
You’ll learn:
- What diversification actually means in trading (not just asset class)
- How to evaluate which instruments fit your edge
- The pros and cons of Forex, Indices, Share CFDs, and Commodities
- How to filter a watchlist to 3–6 high-fit instruments
You’ll receive a Market Evaluation Checklist to assess what’s tradable for you.
Diversification should amplify your edge, not scatter it. This session helps you create a manageable, focused list of symbols that suit your style.
We’ll cover:
- Creating core and secondary instrument tiers
- Matching systems to market personality (e.g., trending vs volatile)
- Building your daily review plan for multiple instruments
You’ll receive a Multi-Instrument Tracker Sheet and a template for structured market prep across your list.
This keeps your attention sharp while giving you more opportunity flow.
Scaling is more than increasing size — it’s about upgrading your process. In this session, you’ll learn what it means to operate like a professional with larger capital.
We’ll cover:
- The difference between scaling systems vs scaling size
- Risk compression and compounding models
- Managing emotions as trade size increases
- When to adjust systems for capital tiers (R10k vs R100k vs R1m+)
You’ll receive a Scaling Strategy Map to plan your next capital level with structure.
This session helps you map out how to responsibly grow capital while protecting edge and psychology.
We’ll cover:
- Milestone-based capital increases
- Withdrawals vs reinvestment strategies
- How to split capital across systems/instruments
- Adding passive capital sources (funded accounts, prop firms, etc.)
You’ll receive a Capital Growth Planner to help visualise your future scaling path.
This sets the mindset and structure to move from small trader to capital allocator.
Burnout in trading isn’t just fatigue — it’s a slow erosion of focus, confidence, and motivation. In this session, we explore the root causes of burnout and how it shows up in your trading patterns.
We’ll cover:
- The difference between stress, fatigue, and true burnout
- Key warning signs: overtrading, detachment, emotional numbness
- How system mismatch, poor routines, and external stress amplify the problem
- Why more screen time or “pushing through” often makes it worse
You’ll receive a Burnout Risk Checklist to assess your current state and pinpoint the key areas causing overload or disengagement.
This session focuses on practical recovery strategies and long-term sustainability — without stepping away from trading completely.
We’ll explore:
- Energy-based trade scheduling (not just time-based)
- Daily and weekly rhythm design for focus and rest
- Using “non-trading” days productively
- Realigning strategy with lifestyle and personality
You’ll receive a Sustainable Trading Planner to design a rhythm that works for you — not against you. This is about staying in the game with energy, clarity, and longevity.
In this powerful end-of-year session, we reflect on what the last 12 months revealed — in performance, systems, psychology, and growth.
We’ll guide you through:
- Reviewing trade logs and journal entries for key patterns
- Identifying what worked, what didn’t, and what surprised you
- Filtering your most profitable setups and conditions
- Reviewing equity curves, risk stats, and decision consistency
You’ll receive an Annual Review Worksheet and a Metrics Summary Template to capture your top-level insights.
With your insights gathered, it’s time to set direction. This session helps you create a forward-looking game plan with clear intentions, goals, and system alignment.
We’ll cover:
- Setting realistic, data-driven goals (not vague resolutions)
- Choosing 1–2 core systems to refine or scale
- Building a quarterly checkpoint rhythm
- Creating your next launch checklist
You’ll receive a 12-Month Relaunch Planner with space for goals, habits, and checkpoints — so you enter the new year with clarity and momentum.
Strategy and execution pathway
Strategist is built around one practical question: how do you turn a trading idea into a complete trading system?
Strategist is a live, progressive program that shows how a trading idea is developed into a complete, testable and repeatable trading process.
The program starts with the idea itself and progressively works through the decisions a real system needs: the hypothesis, setup, trigger, invalidation, stop, position sizing, risk, trade management, adds, exits, market selection, testing, review and the operating process that holds everything together.
By following the live worked example, you progressively see a complete Forex methodology deconstructed and rebuilt. If you are developing your own idea alongside it, you also build a much clearer process for deciding what needs to be defined, tested, measured and improved before that idea can become a real trading system.
How the program works:
- Understanding how a trading system is built.
- Using a live practical worked example.
- Refining your own system
These sessions are designed to help members think more clearly about trading as a process, not just a collection of entries and exits.
The Strategist pathway is ideal for traders who already understand some basic charting but want a more organised way to turn analysis into a repeatable trading approach.
- Start with the problem the system needs to solve.
- Understand the general system-building principle behind it.
- See how the worked example solves that problem in practice.
- Apply the same question to your own System Development File.
An indicator, chart pattern or repeated market observation may point towards an opportunity, but it is only the starting point. This session looks at the difference between seeing something happen and having a clear idea that can be developed and tested.
You’ll understand: the difference between an observation, a trading idea and a trading hypothesis, and why a signal alone is not enough to define a system.
Worked example: a simple 8/21 relationship is used only as the starting observation, allowing the focus to stay on the behaviour behind the signal rather than on the finished rules.
For your own system: identify the behaviour you believe your own idea is trying to capture and record it in your System Development File.
The next step is to turn the idea into a statement that can eventually be tested. We use good and bad examples to separate the visible signal from the market behaviour the system is actually intended to capture.
You’ll understand: what a useful trading hypothesis looks like and how it gives direction to the rest of the build.
Worked example: the starting observation is challenged across different examples so that the first trading hypothesis can be defined around behaviour rather than the indicator itself.
For your own system: write your own Hypothesis V0.1: what you believe happens, under what broad circumstances, and why that behaviour may create an opportunity.
We now apply the setup principle to the worked example and begin building the first real structure around the original idea. Broader market context, multiple timeframes and the relationship between shorter- and longer-term behaviour are introduced because the simpler version cannot answer those questions on its own.
You’ll understand: why a system often needs more than one layer of context and how different timeframes can perform different jobs inside the same setup.
Worked example: the Daily, 240-minute and 60-minute roles begin to take shape, with the 21/89 relationship introduced as part of the broader context that gives meaning to the shorter-term signal.
For your own system: build a first Setup V0.1 for your own idea by defining context, qualifying conditions and early disqualifiers.
A setup and a trigger do different jobs. This session defines the point at which a promising market condition becomes an actionable trading decision, and what a useful trigger must confirm before it belongs in a system.
You’ll understand: how to separate setup conditions from the event that causes action, and how a trigger reduces premature or discretionary entries.
Worked example: the existing methodology is used to show how the shorter-term trigger sits inside the broader setup rather than operating as a standalone signal.
For your own system: define what must happen before you are prepared to act on your own setup.
You’ll understand: what makes an entry rule specific enough to follow, review and eventually test.
Worked example: valid and invalid entries are compared so the execution rules become clear without turning every market situation into a new exception.
For your own system: write Entry Rules V0.1 for your own system, including what confirms the entry and what causes you to stand aside.
You’ll understand: the difference between normal price movement and genuine invalidation, and how structure can be used to define protection.
Worked example: swing points, consolidation support or resistance and opposite structure are used to show how the stop follows the trade idea.
For your own system: define what would invalidate your own trade idea and identify the market information your stop should be based on.
You’ll understand: how stop distance, risk percentage and position size work together, and why size should be a result of the risk decision rather than a guess.
Worked example: the completed entry and stop are used to calculate initial exposure on the worked example.
For your own system: set an initial risk rule and a repeatable position-sizing method for your own system.
You’ll understand: how to distinguish useful trade management from reacting to every fluctuation in P&L.
Worked example: the methodology is used to show how structure, opposing signals and changing conditions can affect an open trade.
For your own system: decide which events justify action after entry and which do not.
You’ll understand: how to add without allowing several individually acceptable entries to create an unacceptable total position.
Worked example: higher- and lower-timeframe opportunities are combined into one campaign, with different limits for fresh and mature trends.
For your own system: define whether your system allows adds, what qualifies as an add and the maximum risk you will allow across the full idea.
You’ll understand: how an exit can respond to the trade idea changing rather than simply to a fixed profit or loss number.
Worked example: the single-pair process is completed by looking at when to close, when to stand aside and when an opposite opportunity represents a new trade rather than an emotional reversal.
For your own system: define the events that end your trade and what must happen before an opposite position can be considered.
You’ll understand: why market selection is a separate system decision and why a technically valid setup is not automatically the best opportunity available.
Worked example: the same trading process is compared across different currency pairs to expose the need for a selection layer.
For your own system: decide what information your system would need if it had to choose between several valid opportunities.
You’ll understand: how relative strength can help organise a large Forex universe and why the choice of both currencies in the pair matters.
Worked example: currency and pair comparisons are used to show how a shortlist can become more selective before the technical setup is considered.
For your own system: identify whether relative strength or another comparative measure could improve market selection in your own system.
You’ll understand: why currencies often respond to changes in expected rates and yields rather than simply to the current headline interest rate.
Worked example: real currency examples are used to connect changes in rates and yields with relative currency behaviour.
For your own system: consider whether your market-selection process needs information beyond the chart and what role that information should play.
You’ll understand: the basic relationship between economic expectations, policy expectations and currency demand without turning the session into an economics lecture.
Worked example: different macro environments are compared to show why the same data point can have a different market effect depending on the surrounding expectations.
For your own system: identify the broader information that may materially affect the market you trade and separate it from information that adds noise.
You’ll understand: how macro context can support, conflict with or add caution to a technical opportunity without manufacturing a trade that is not there.
Worked example: technical opportunities are compared with the surrounding currency context to show how the two layers can work together.
For your own system: define how outside information is allowed to influence your own system and, just as importantly, what it is not allowed to change.
You’ll understand: how currency rankings, yield context and market state fit together and what each measure contributes to the selection process.
Worked example: the live Market Map is worked through from top to bottom so the purpose of each section is clear.
For your own system: consider how a dashboard or selection process for your own system should organise information before a trade is considered.
Once the behavioural mistakes are clear, traders need a structured flow to manage trades without constant emotional interference.
You’ll understand: how early change, established alignment and weakening conditions can look different across timeframes.
Worked example: current and historical Market Map states are compared to show how the information evolves rather than remaining fixed.
For your own system: identify whether your own selection process needs a way to distinguish current state from developing change.
You’ll understand: how to move from a large currency universe to a manageable list without confusing selection with entry.
Worked example: the Market Map is taken through the full process from broad currency view to a focused pair shortlist.
For your own system: define the steps your own system would use to narrow a larger universe before applying its setup and trigger rules.
You’ll understand: why counting trades is not the same as measuring exposure and how apparently separate positions can create one large risk.
Worked example: several pair combinations are compared to show when the same currency is driving the whole portfolio.
For your own system: identify where your own system could create hidden concentration when more than one position is open.
You’ll understand: how pair limits, correlated exposure and an overall portfolio cap work together.
Worked example: the worked example uses first, second and possible third-pair exposure to show how risk changes when positions share the same currency driver.
For your own system: set rules for the maximum total exposure your own system can carry when several positions are open.
You’ll understand: what should be tested, what evidence is useful and why changing several variables at once makes conclusions unreliable.
Worked example: parts of the methodology are separated into testable questions so assumptions can be challenged rather than accepted because the finished system already exists.
For your own system: turn the major assumptions in your own system into clear test questions with pass, fail or inconclusive outcomes.
You’ll understand: the difference between testing a component and testing the complete decision chain from selection through exit.
Worked example: the full worked methodology is examined as one connected process rather than as a collection of separate rules.
For your own system: design a simple test plan for your complete system and decide which results would genuinely change your view of it.
The final session turns the year’s work into a forward-looking development plan. Traders will define what needs to be refined, reduced, strengthened, or scaled over the next cycle.
You’ll understand: what needs to be recorded to separate system performance from execution quality and repeated decision errors.
Worked example: trade examples are reviewed by decision quality and rule adherence rather than by P&L alone.
For your own system: decide what your journal must capture so you can evaluate both the system and the way you execute it.
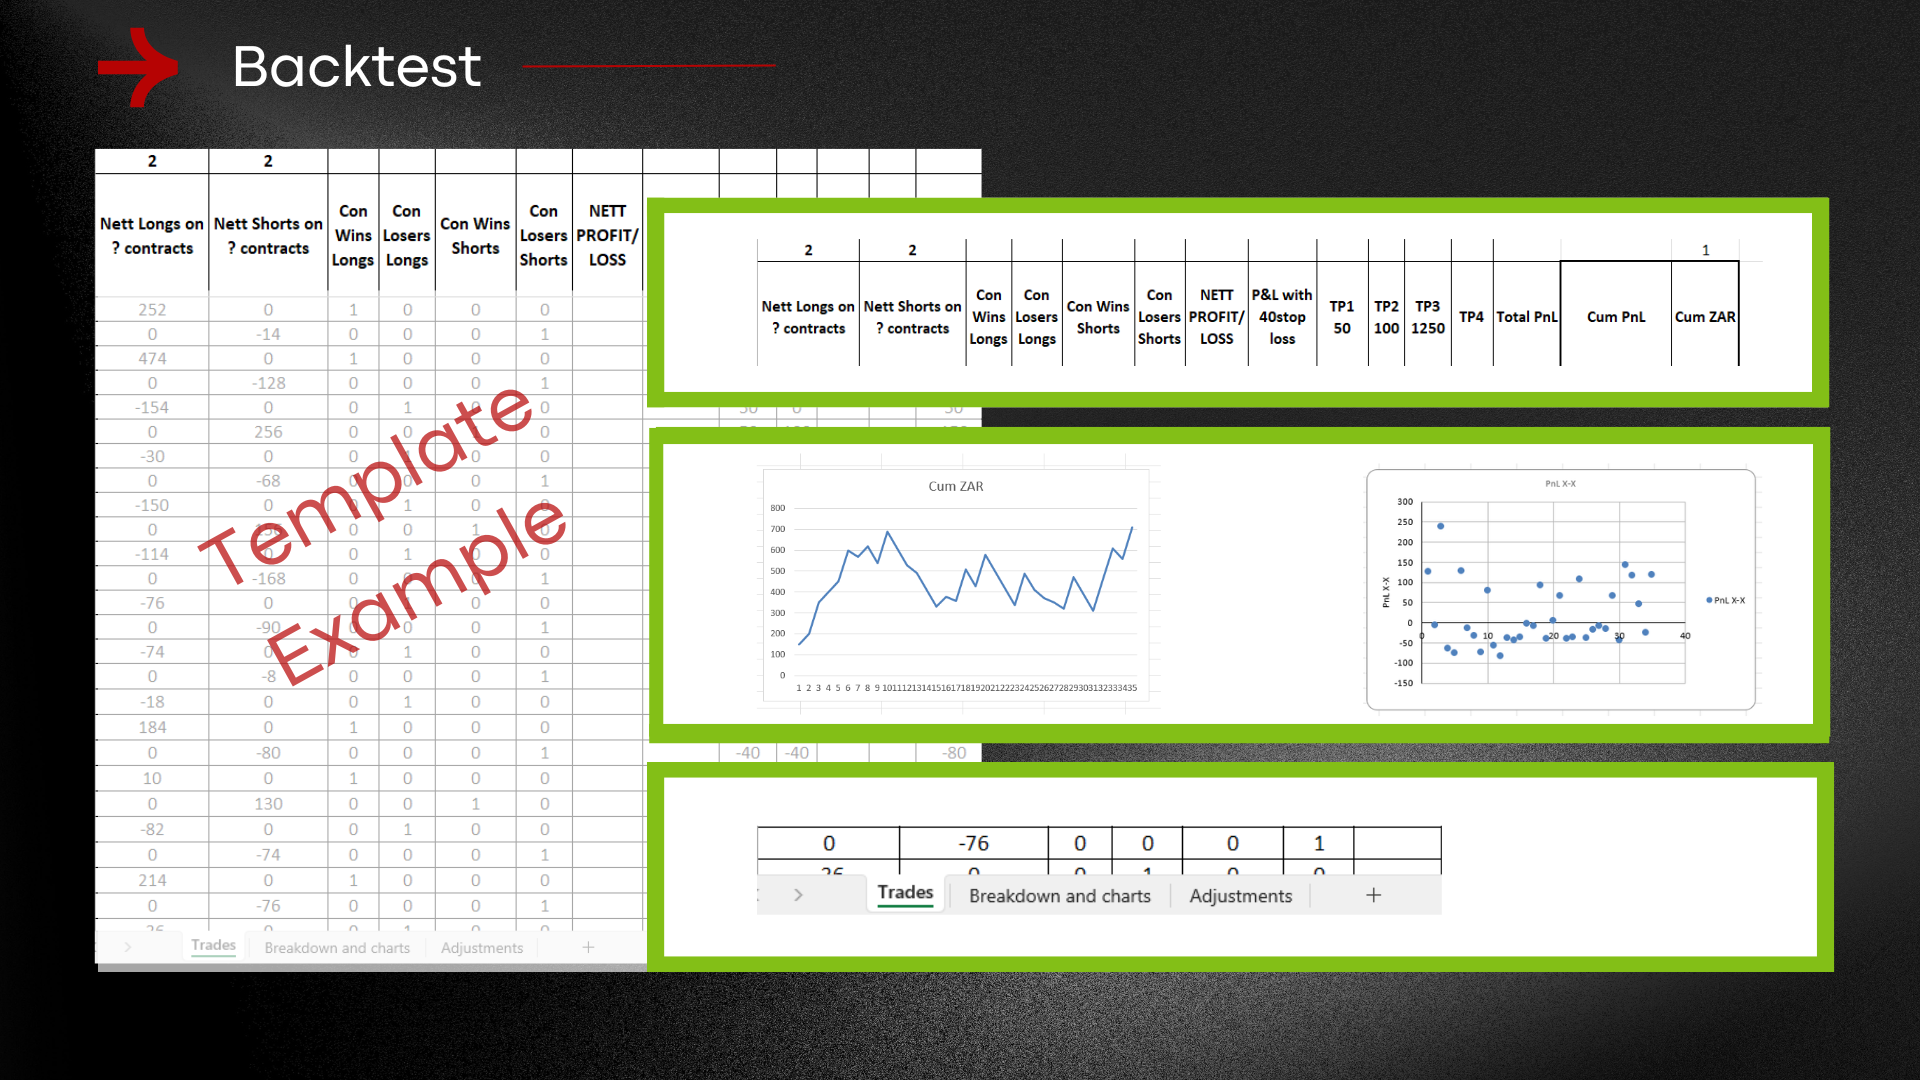
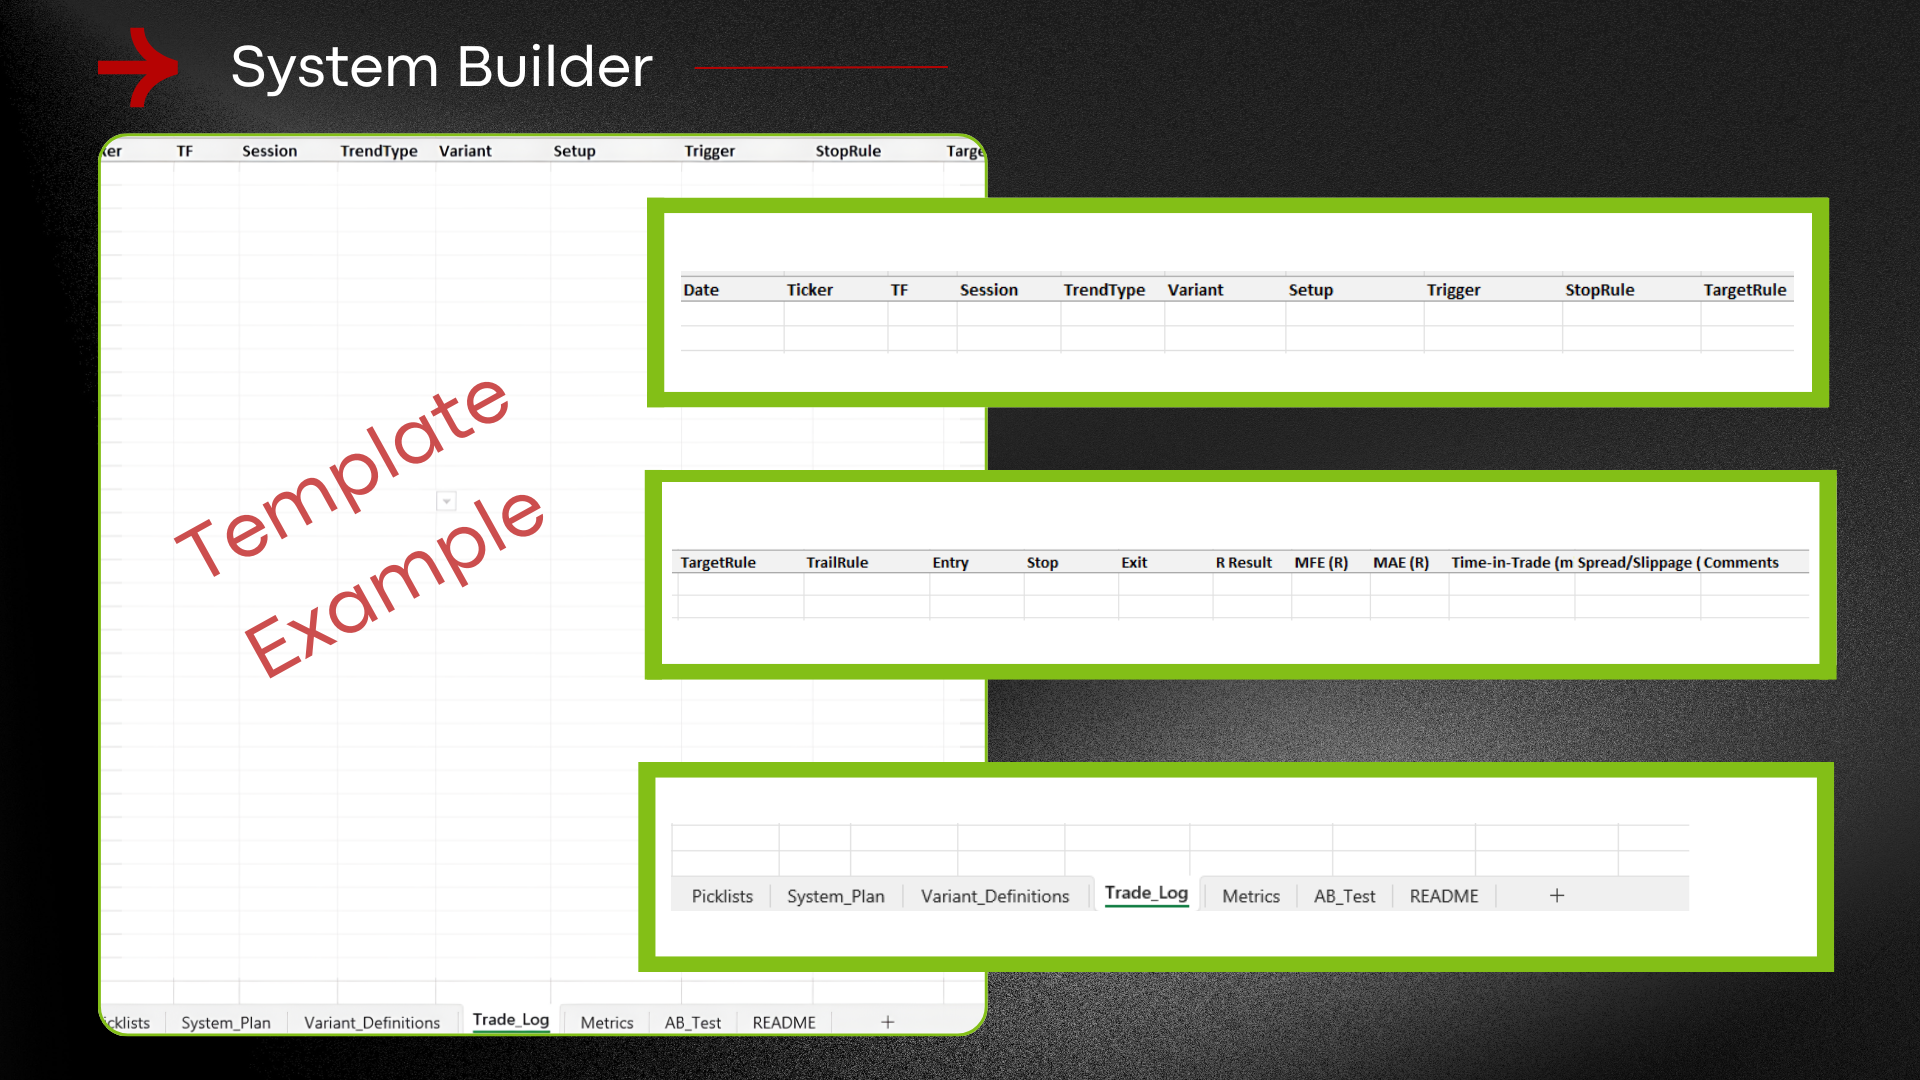
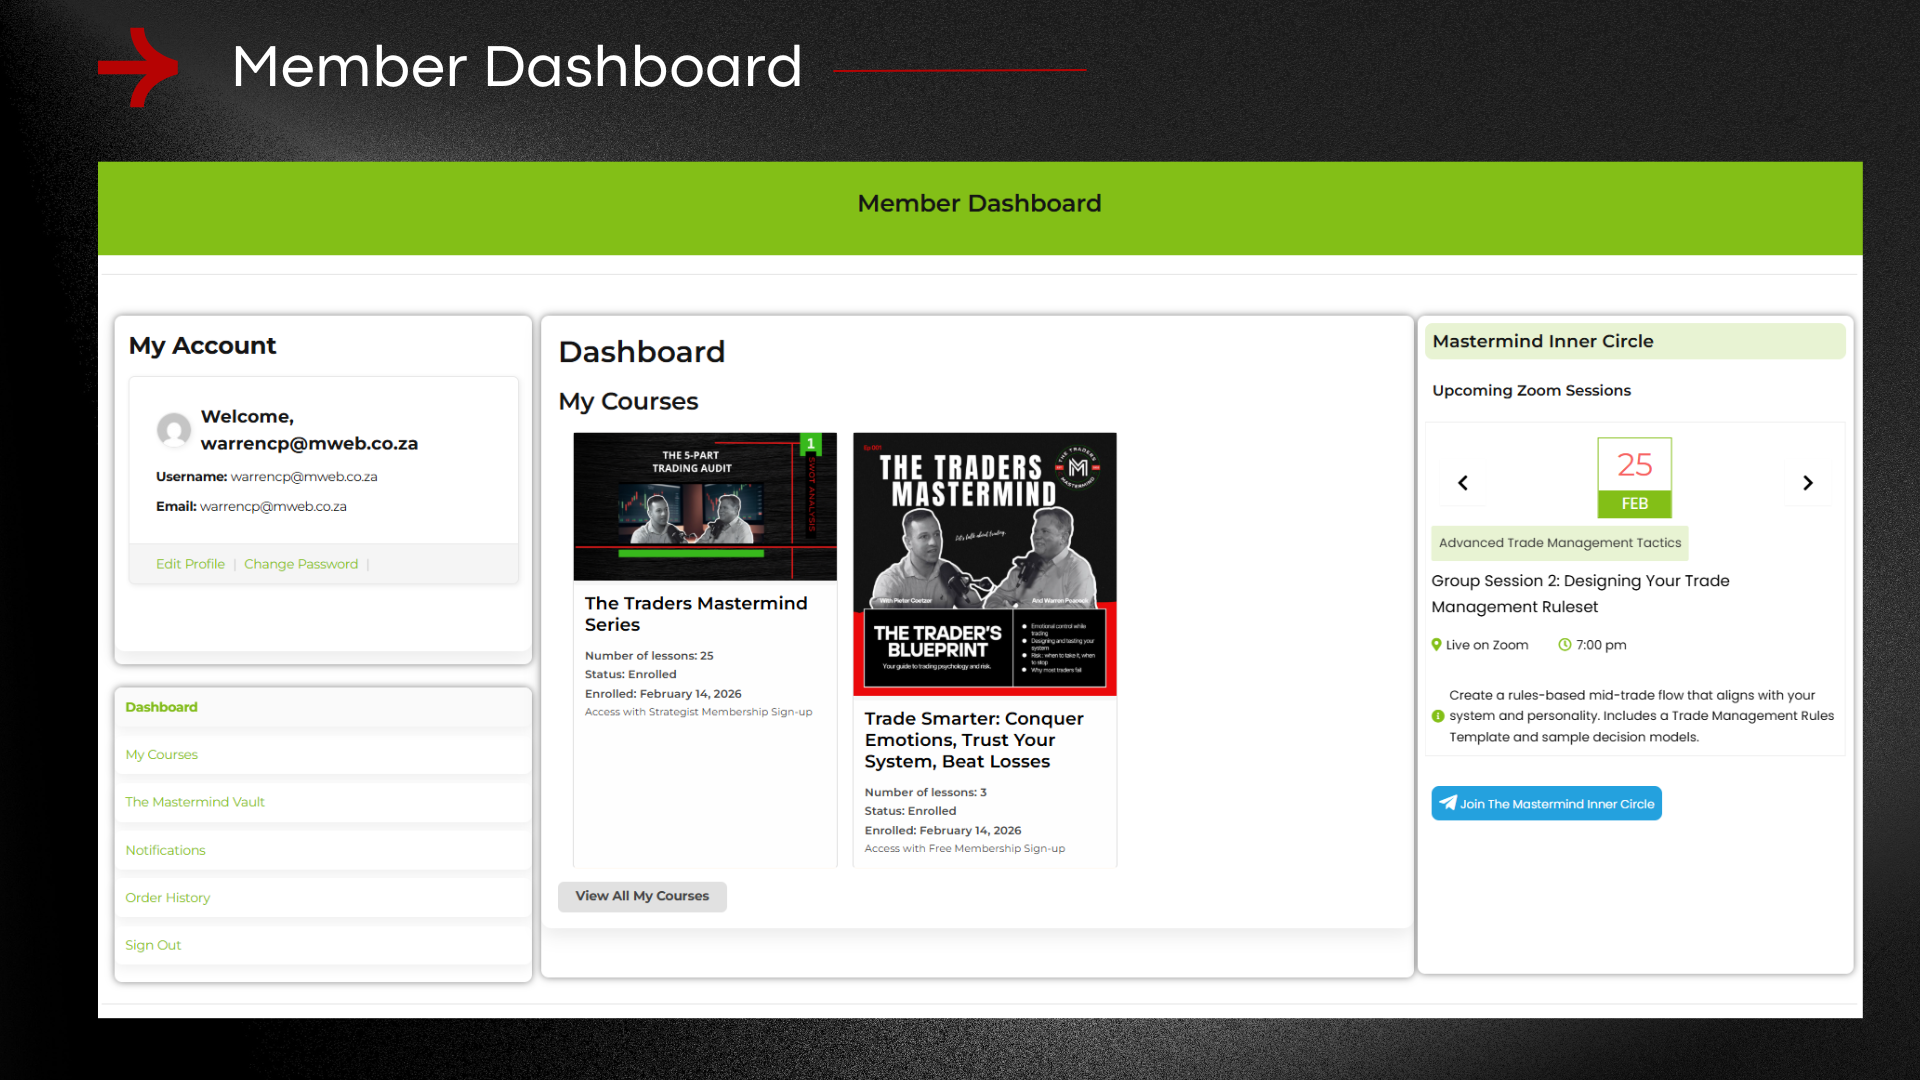
The Traders Mastermind Templates
What the Inner Circle Includes
Compare Your Options
Choose a single pathway, or get the full Traders Mastermind experience with Inner Circle
VALUE
PATH
Your Trading Coaches

Pieter’s trading journey began in 2016 while studying for his BCom in Business Management, where a live trading group and automated systems sparked his passion for the markets.
By 2018, he was trading full-time — focusing on long-term trends and international equities. His approach is built on patience, strategic positioning, and the power of compounding returns.
At Traders Mastermind, Pieter shares these principles through targeted sessions, helping members apply proven strategies with confidence in real market conditions.

With over 20 years in the markets, Warren has traded it all — from stocks and indices to forex.
He’s trained hundreds of traders, served as Head Market Analyst for IG Markets, and shared his insights on CNBC Africa and leading radio stations.
From 2015 to 2024, Warren coached clients at Standard Bank Securities, running technical analysis webinars and workshops, while also contributing to ABSA Bank’s educational programs.
Today, he’s laser-focused on one thing: helping traders master the markets with proven strategies and clear, actionable training.
They fail because they’re operating without structure, feedback, or weekly accountability.
What’s the one thing you wish someone had taught you earlier in your trading journey?
Member Reviews
See what our members have to say and share your experience. Help others make informed decisions.
Verified Feedback
Real-World Insights
Your Voice Matters
Build your system.
Trade it with discipline.
You need one structured process, applied consistently.
Cancel anytime • Replays included
Disclaimer :
The Traders Mastermind provides educational content only. Nothing in this membership should be treated as financial advice, investment advice, or a recommendation to buy or sell any financial instrument. Trading involves risk, and past performance does not guarantee future results.